Public Visibility: switch it off so your family photos stay out of Explore.
AI photo restoration samples from four decades
A folded 1950s wedding and a yellowed 1970s porch remixed from 5-second originals, plus a 1960s beach snapshot and a 1980s instant photo fixed here.
Each card names the damage, the How to restore option that fits it and the model behind it. Press Restore one like this and the workbench opens with that option picked; you only add your own photo.
1950s wedding
Original: a black and white wedding portrait with a diagonal crease, white scratches and dust, repaired, colorized and animated into a 5-second clip on aiaigenerator.ai. Here: 4 seconds cut out with new framing and colour; the bride turns to the groom and both smile. Matching workbench option: Repair and colourise.
Original: a 1970s colour snapshot with a heavy yellow-orange cast and a water stain, brought back to neutral whites and animated into a 5-second clip on aiaigenerator.ai. Here: 4.6 seconds cut out; the mother on the step waves while her two sons stand behind her. Matching workbench option: Remove the yellow cast.
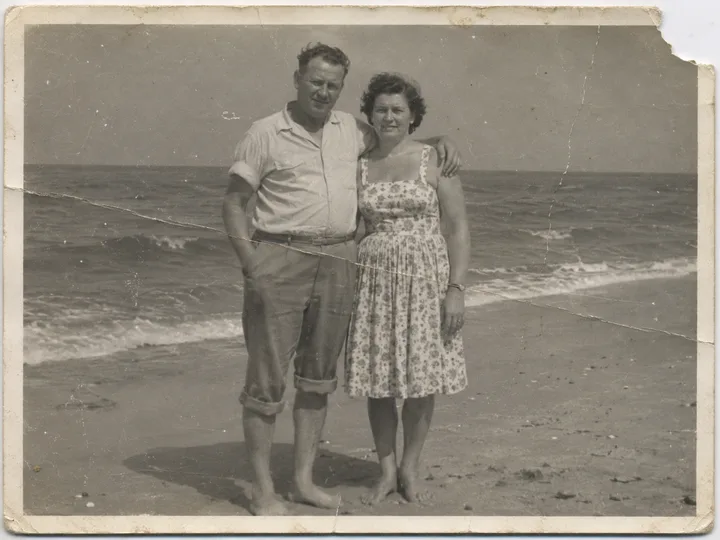
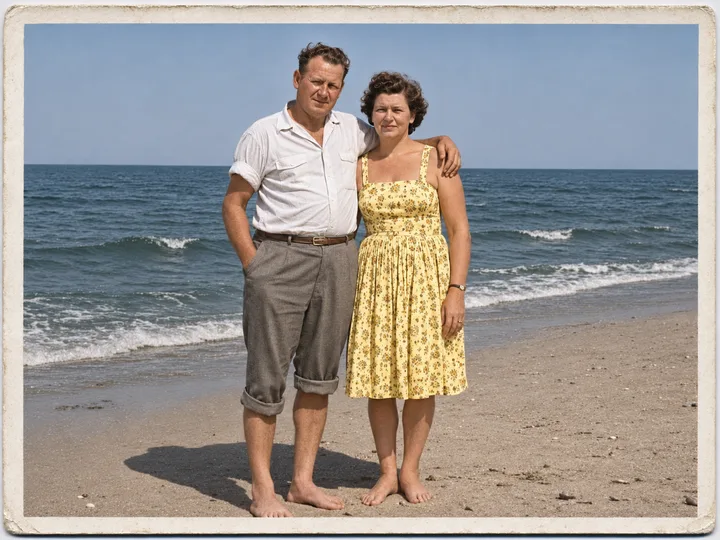
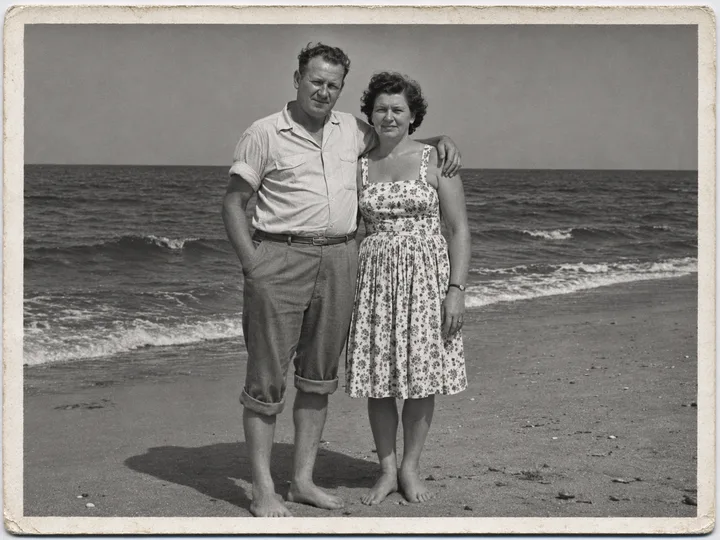
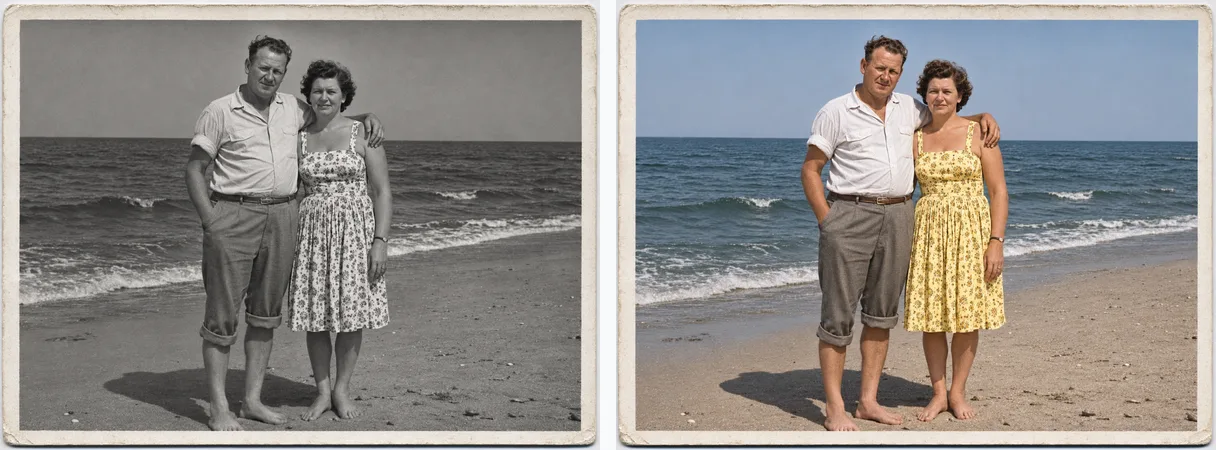
A black and white beach print with a torn top-right corner, two creases, scratches and dust. First repaired in black and white (thumbnail), then colorized with what the family remembers: a lemon-yellow floral dress and a white shirt. The missing corner was filled with sky and sea. On the workbench: Repair and colourise, with those colours in Details.
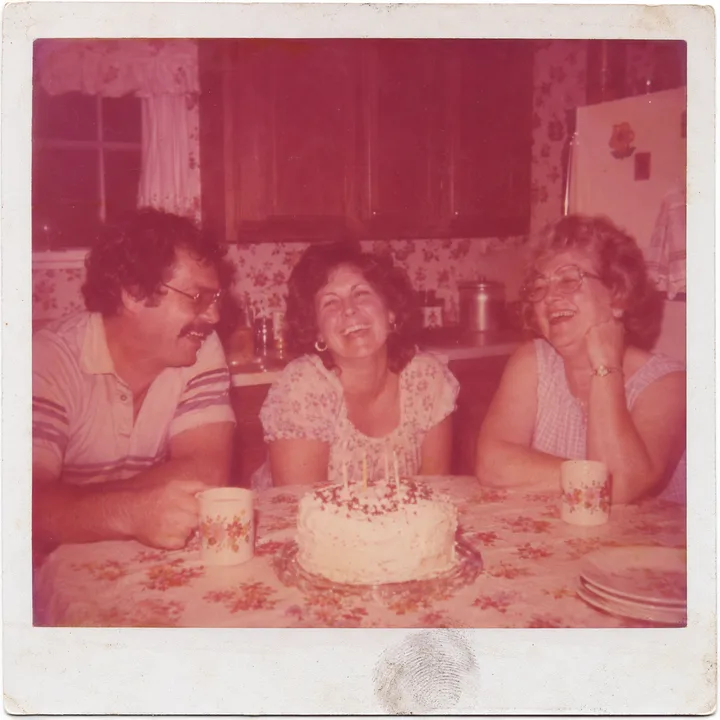
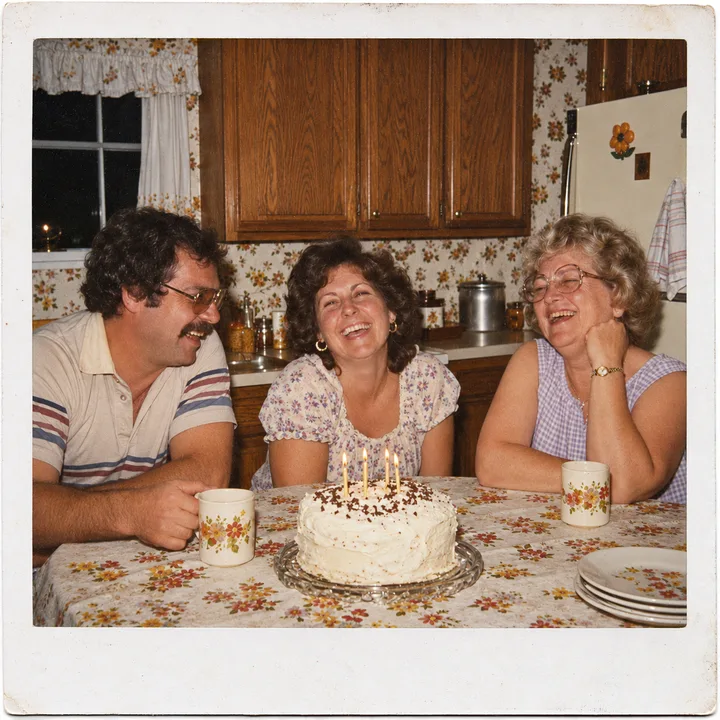
A 1980s instant photo turned magenta, with washed-out shadows and a fingerprint on the white frame. After: neutral whites, natural skin, wooden cabinets and floral wallpaper; the three faces and the birthday cake stay the same. On the workbench: Remove the yellow cast.
How to restore old photos on Ghibliia with AI photo restoration
Digitize the print, upload it, pick how to restore it and press Generate image; keep the untouched scan.
Unsure about colour? Repair it in black and white first, then run that version again with Repair and colourise.
1
Digitize
Turn the paper print into a file with a scanner or your phone. The next section covers resolution and glare.
2
Upload
Drop the file into the Your old photo box. One photo goes in per run and one restored image comes out.
3
Pick how to restore
Under How to restore choose Repair and keep black and white, Repair and colourise or Remove the yellow cast. If you know a colour, type it in Details. Press Generate image: the button shows the credits before you generate (3 with Nano Banana).
4
Download and keep the original
Download the result and keep the untouched scan in another folder. If a fix looks wrong, go back to the scan and try another option.
Black and white from the 50s and 60s loses creases and scratches; colour from the 70s and 80s loses its yellow or magenta cast.
Black and white from the 50s and 60s
Creases, fine scratches, dust, stains, flat contrast and soft faces fix well. In the 1960s beach print both creases disappear and the torn corner gets its sky and sea back.
Option: Repair and keep black and white, or Repair and colourise if you want colour.
Colour from the 70s and 80s
Colour prints drift yellow, orange or magenta and lose their shadows. In the 1980s instant photo the white of the cake and the wood of the cabinets come back.
Option: Remove the yellow cast, which also handles magenta without pushing saturation.
What cannot come back
When a large piece is missing or a face is wiped out, the AI fills it with a guess. Pushed too far, a face can start to look like someone else, so always compare with the original.
Colour is a guess, so type the colours your family remembers and keep the black and white copy.
Type the colours you remember
A black and white print cannot tell anyone what colour a dress or a car was. The AI reads skin, sky, sand and wood from context and makes up the rest unless you say otherwise. Paste this into Details and change it to what your family remembers:
the dress was lemon yellow with flowers, the shirt white, the sea pale blue
Compare the faces
Put the result next to the original and check eyes, mouth and nose. If someone no longer looks like themselves, start again from the scan with Repair and keep black and white, then colourise that version. Keep both: the black and white one is the most faithful.
About 300 pixels per inch: 1500 × 2100 for 5x7, then frame it or put it on a Christmas card.
Print size
Pixels at 300 per inch
4x6
1200 × 1800
5x7
1500 × 2100
8x10
2400 × 3000
Print sizes
Check the pixel size of the downloaded image before you send it to print. For an 8x10, scan the print at 600 dpi from the start.
A frame for the grandparents
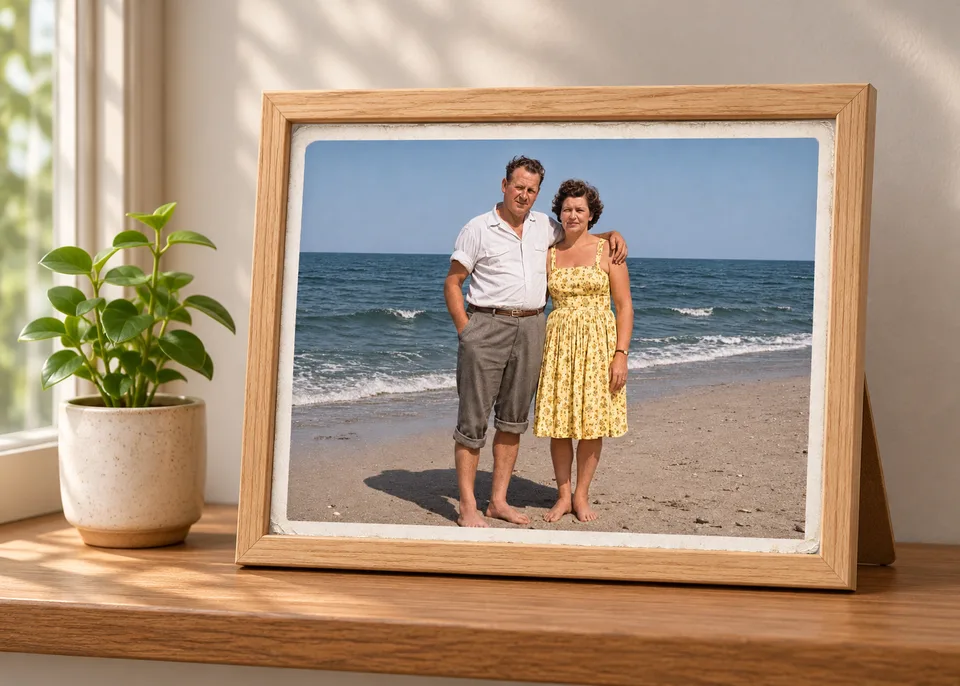
The restored 1960s beach photo, printed at 5x7 in a light oak frame, is a gift nobody needs explained. Print the black and white version too if you are not sure about the colours.
Christmas card
Download the restored photo and upload it to Christmas card: one photo becomes a card you can send by message.
AI photo restoration next to Photoshop and photo apps
Photoshop for pixel control, Remini and MyHeritage for faces, Gemini by chat; here Nano Banana with the restore steps built in.
Route
Good at
What you need
Limits
Photoshop
Spot Healing Brush and the Photo Restoration neural filter, pixel-level control
Photoshop and practice
More hands-on work per photo
Remini
Sharpening faces
The Remini app by Bending Spoons
Built around faces
MyHeritage
Photo Enhancer, In Color for colour and Deep Nostalgia to animate faces
Uploading the photo to MyHeritage
Built around faces in family photos
Gemini
Editing the photo by asking in chat
The Gemini app and your own instructions
You have to ask it to keep the faces
This page
Nano Banana with the restore instructions built in, plus How to restore and Details
A scanned or photographed print
One photo per run; missing pieces are a guess
Photoshop
If you want to decide every pixel, Photoshop's Spot Healing Brush and Photo Restoration neural filter give the finest control. For most family photos you finish sooner here.
Remini and MyHeritage
Remini, from Bending Spoons, sharpens faces. MyHeritage has Photo Enhancer, In Color for colour and Deep Nostalgia, which has animated faces in family photos since February 2021.
Gemini and Nano Banana
Chat-based restoration took off when Google released Gemini 2.5 Flash Image, Nano Banana, in August 2025. It is this page's default model; Flux Kontext Pro and Flux Kontext Max are also on the workbench.
300 dpi covers ordinary prints; go to 400–600 dpi when you plan to enlarge. Keep a TIFF master and edit a JPEG copy.
Should I keep the original scan?
Yes. Restore a copy and leave the scan untouched so you can start over if a fix looks wrong.
Can I restore a whole album at once?
This page takes one photo per run and returns one restored image, so work through the album one print at a time.
Can it fix the yellow cast on a 1970s print?
Yes. Pick Remove the yellow cast to get neutral whites, natural skin and contrast back.
Who can see my restored family photos?
Switch off Public Visibility before you generate and the result will not appear in Explore. The privacy policy explains what is stored and how to request deletion of your account.
Is it better than Photoshop or Remini?
For most family photos it is quicker. Photoshop gives pixel-level control and Remini concentrates on faces.
Can I make the photo move?
Yes. Download the restored photo and open it in Image to Video for a short clip with a smile or a wave.